Enable the User Registerwidget from the ShopReady dashboard and click on Save Changes.
Step - 02:
Create a new page from the WordPress Dashboard > Pages > Add New. And then click onEdit with Elementor. Or click Edit with Elementor on an existing one.
From the left-hand side, search for the ShopReady User Register widget. And drop it onto the newly created page. By default, it should look something like this.
Step - 03:
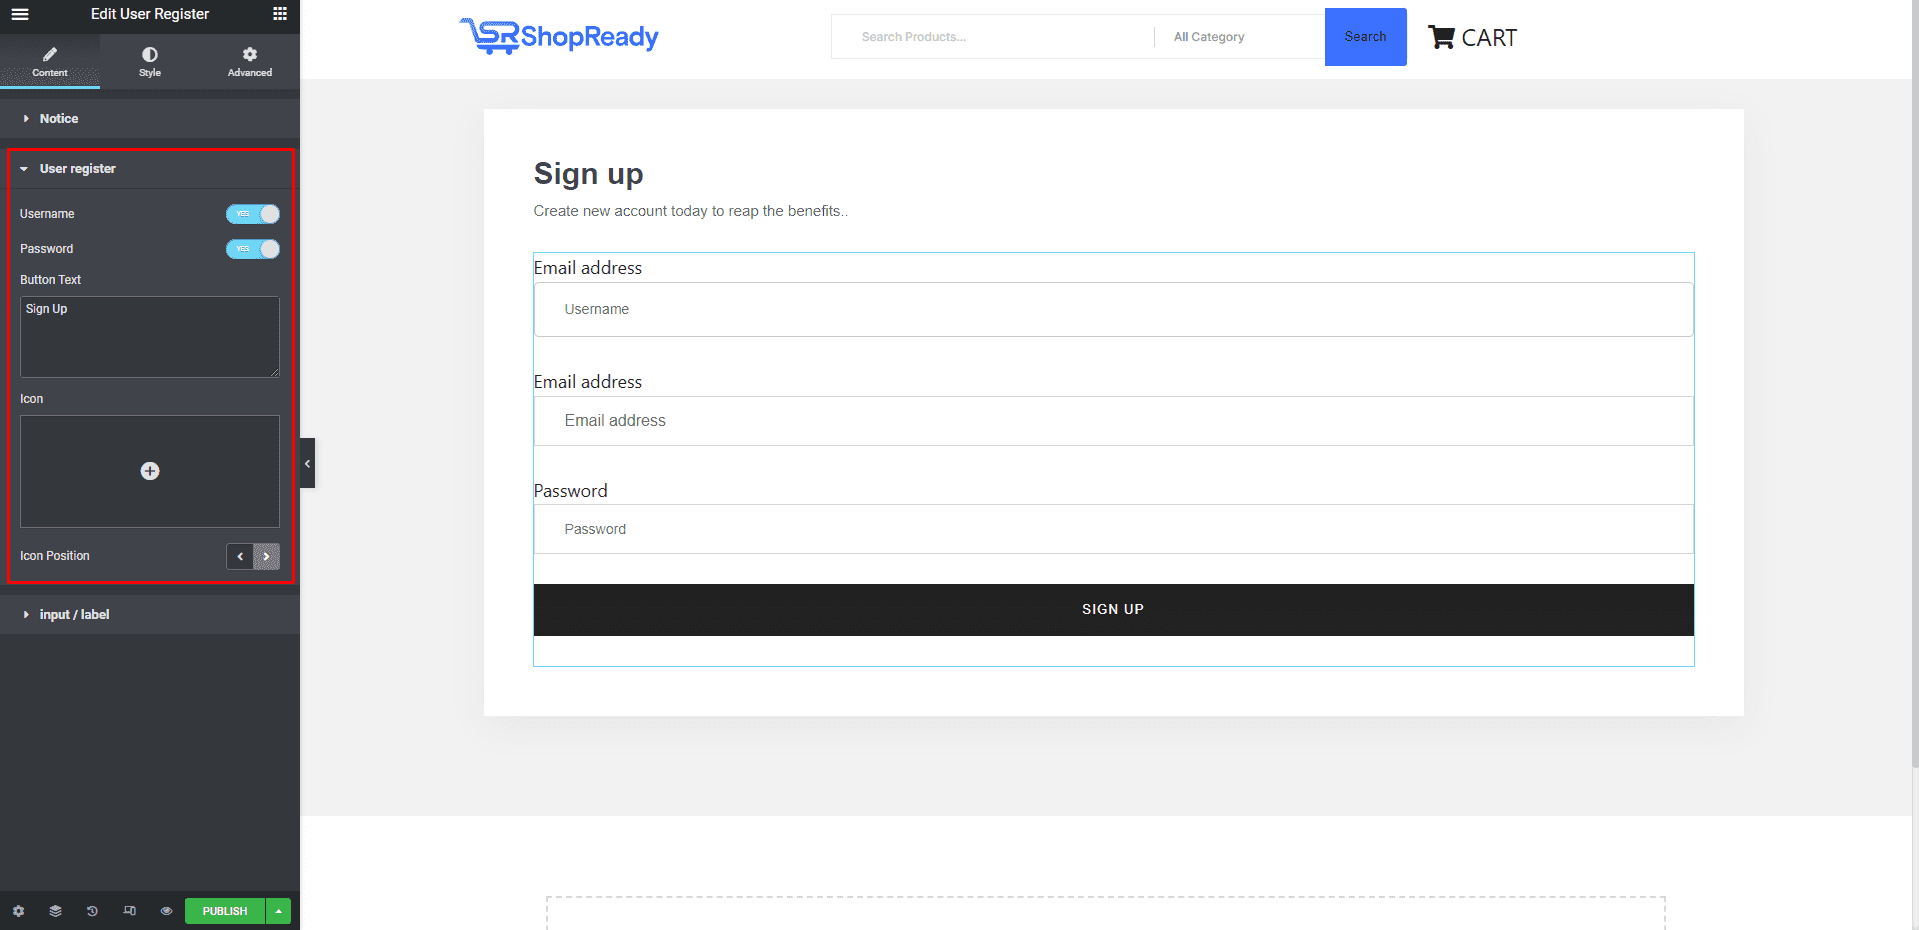
To customize the content displayed on the user registration block, click on the User Registeroption under the Content tab. From here, you’ll be able to show/hide the user name input option and labels, add signup button text, and button icon.
Step - 04:
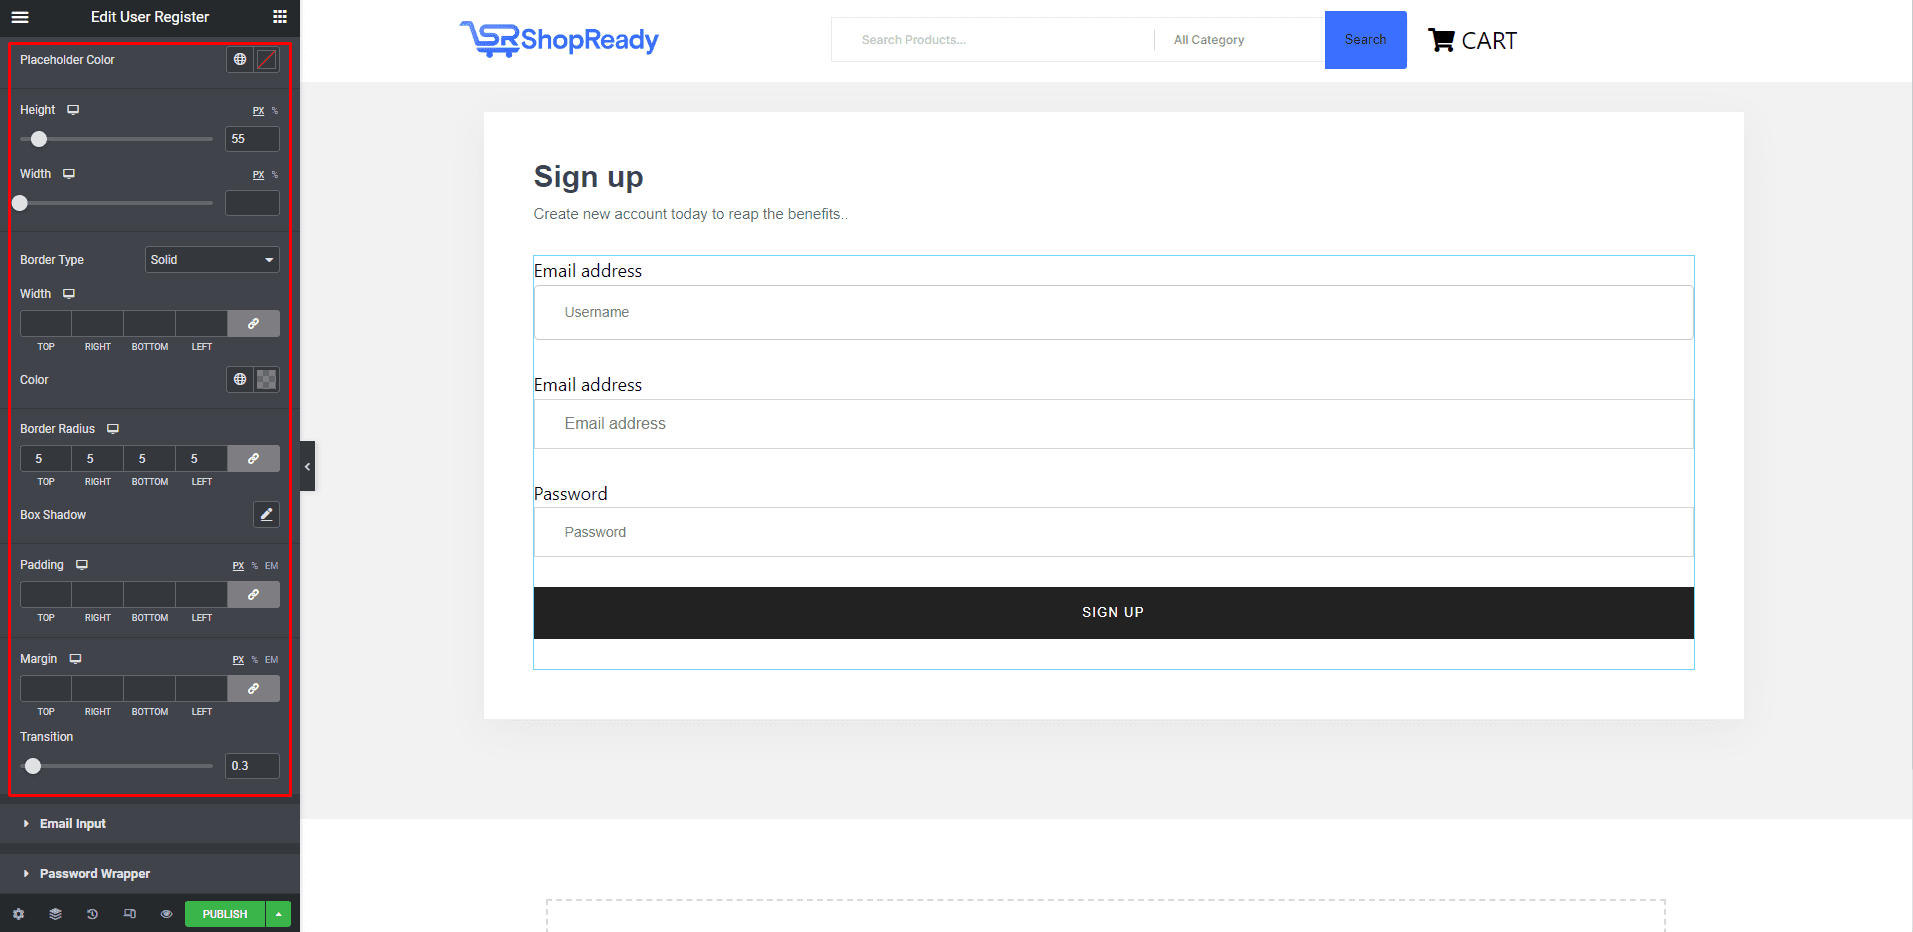
To further customize the look and feel of the account login block, click on the Style tab. From here, you can change the color, typography, margin, padding, etc. to change how the account login interface will look like.
When you’re done customizing your account signup block, make sure to hit PUBLISH/ UPDATEto save your changes.