Enable the Promotional Bannerwidget from the ShopReady dashboard and click on Save Changes.
Step - 02:
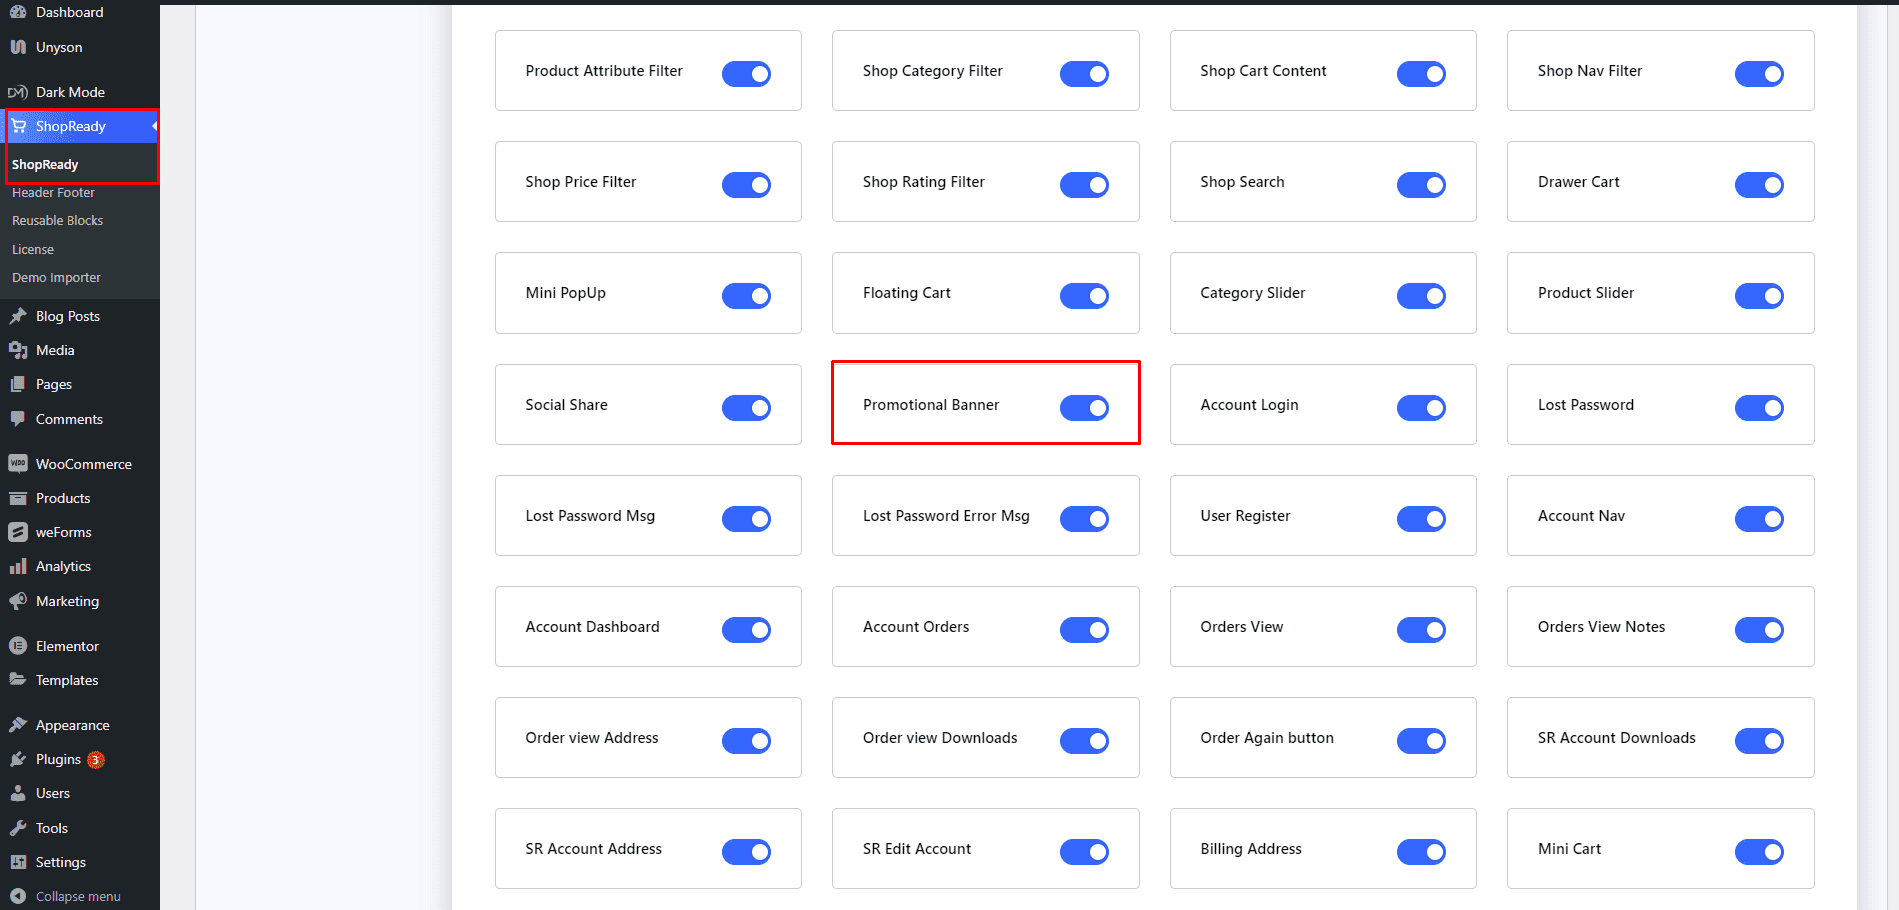
Create a new page from theWordPress Dashboard > Pages > Add New. And then click on Edit with Elementor. Or click Edit with Elementoron an existing one.
From the left-hand side, search for the ShopReady Promotional Banner widget. And drop it onto the newly created page.
Step - 03:
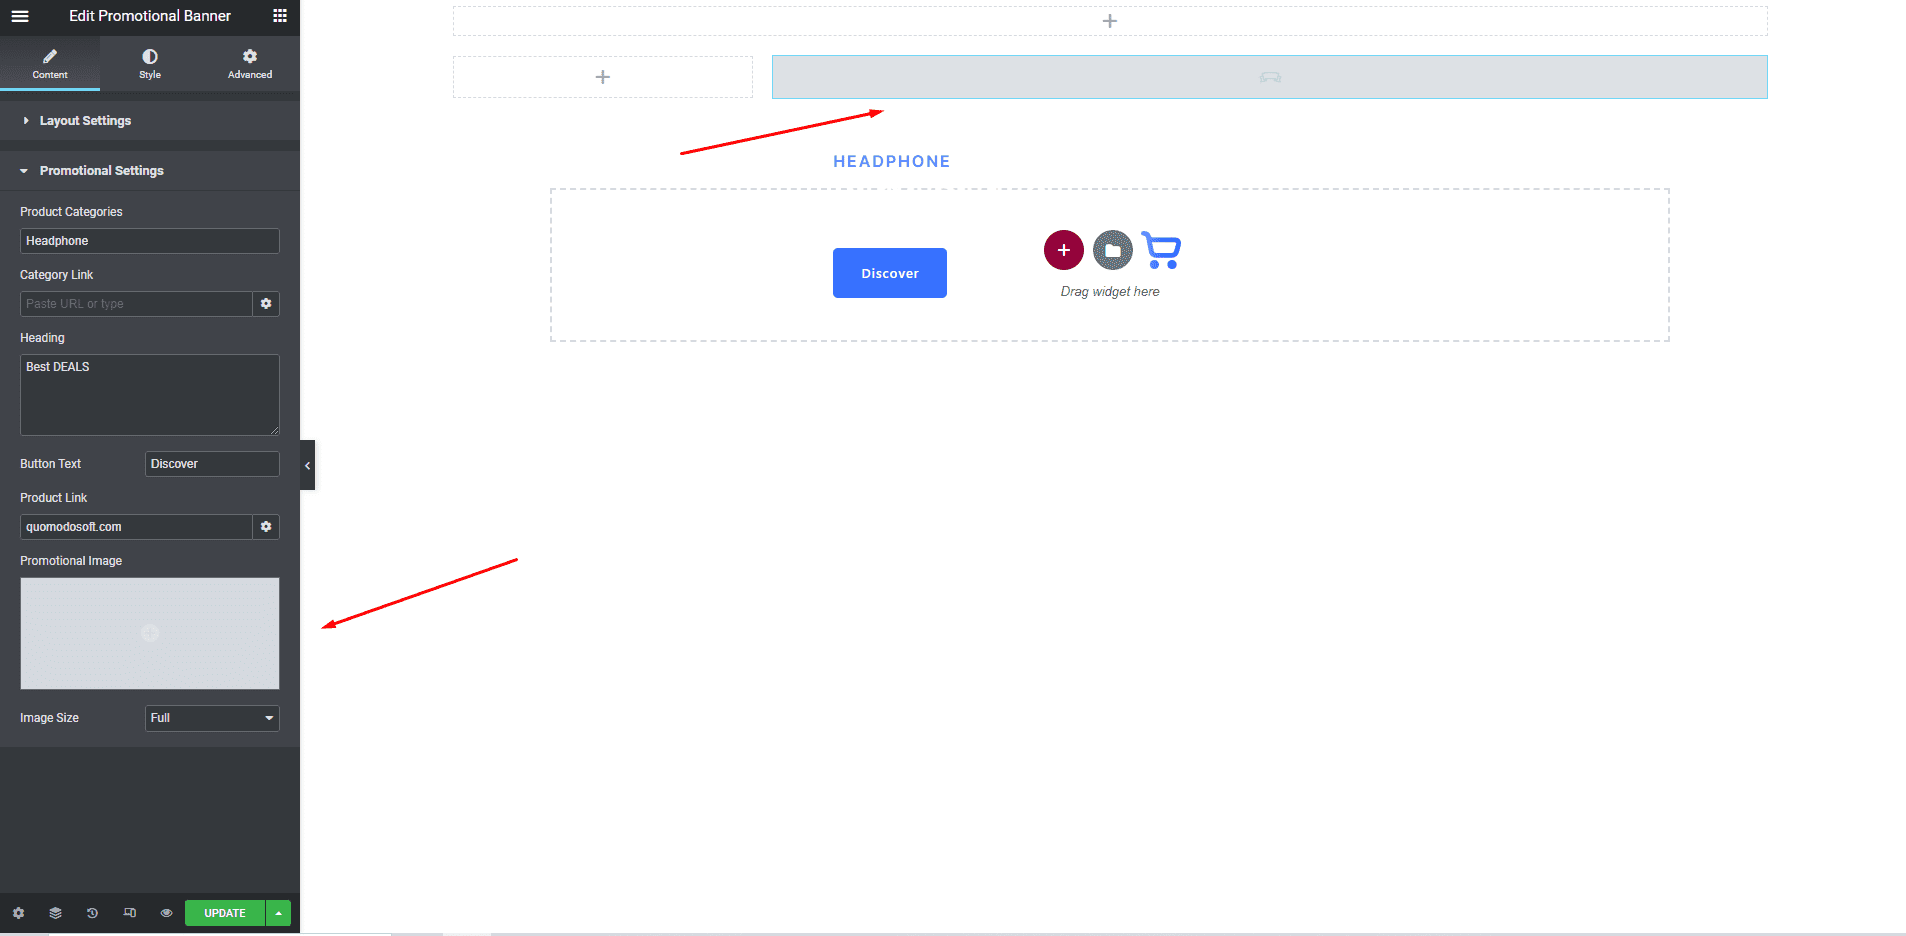
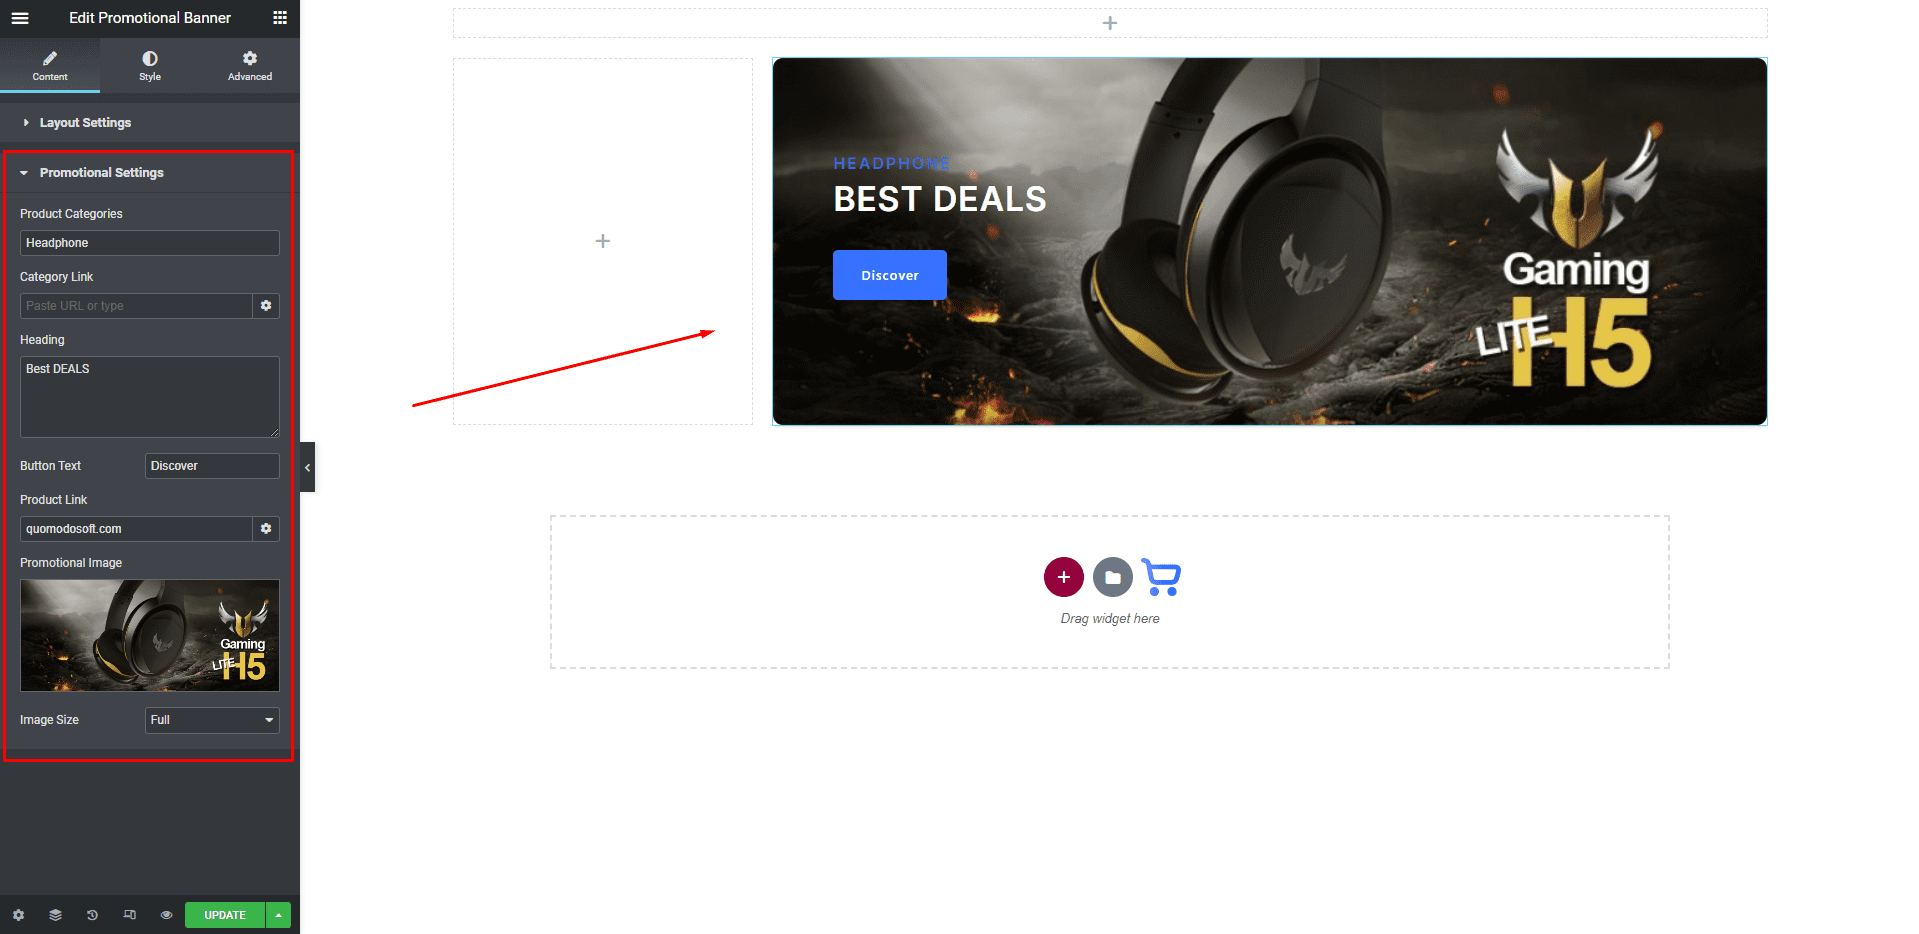
To get your banner, click on the Promotional Imageoption under the Contenttab. Pick a banner image from the Media Library or upload a new one and Insert Media.
From the Content tab, you can also edit the banner header, product category title, button text, link, and image size.
Step - 04:
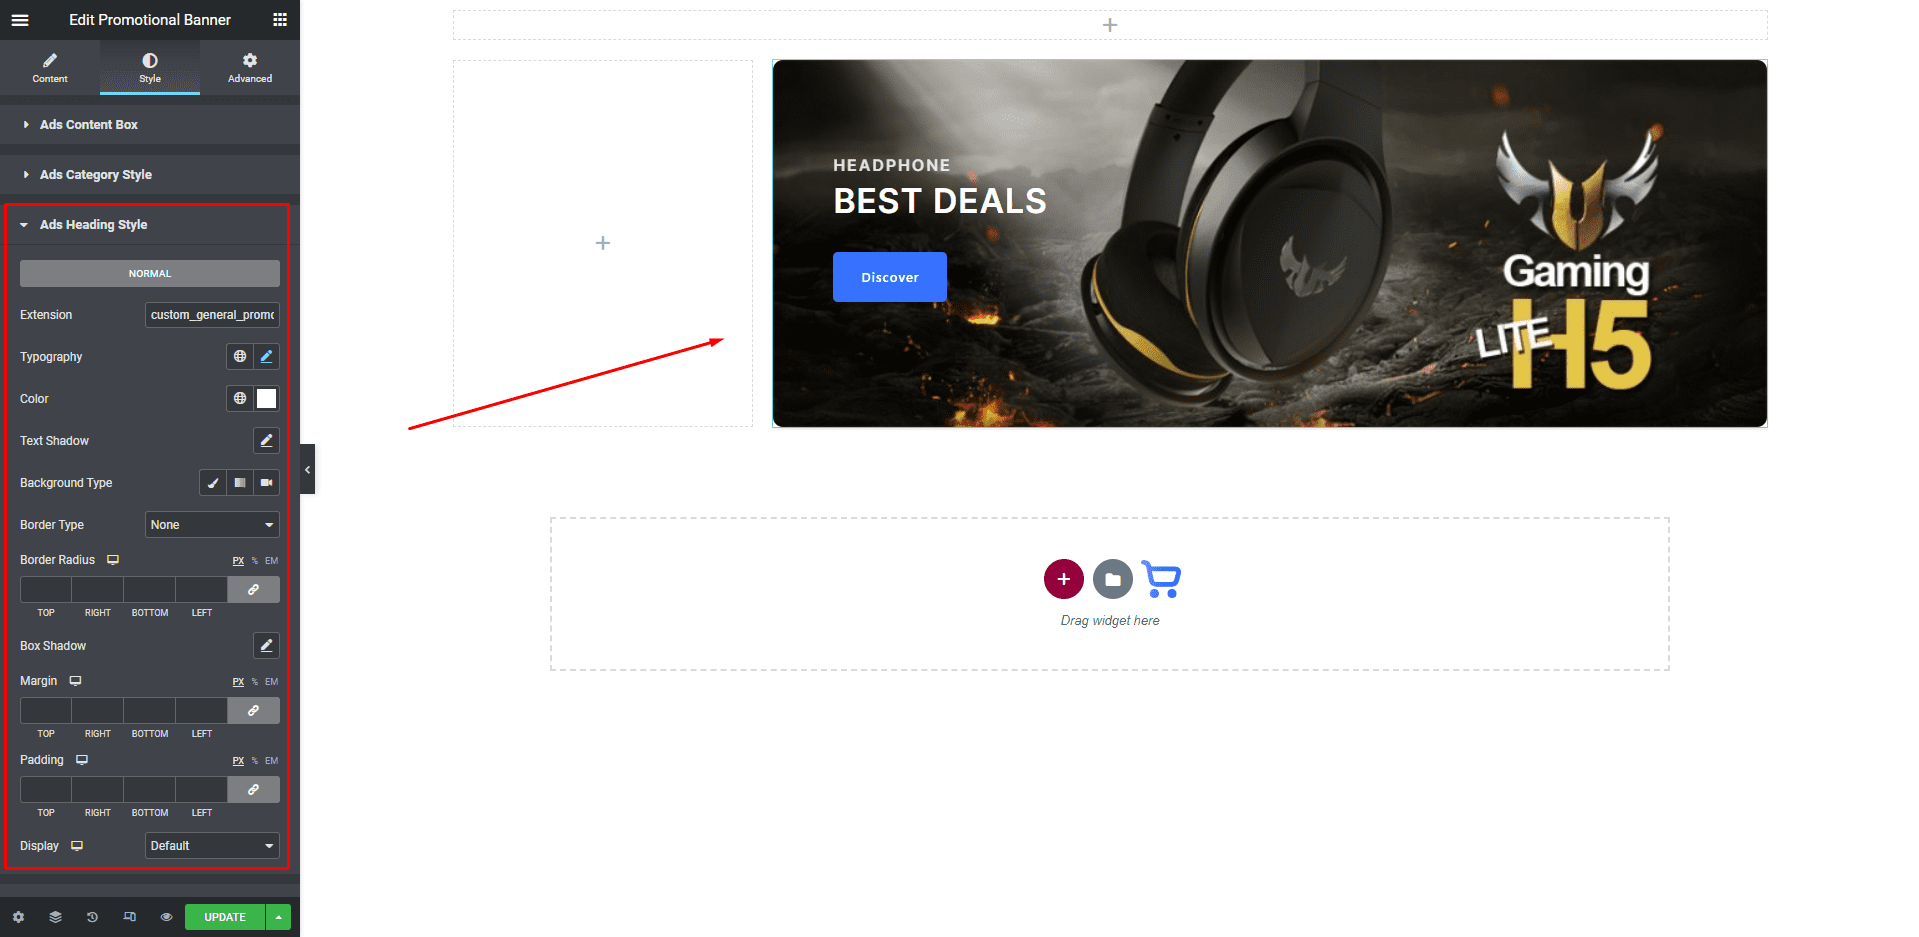
You can further customize the promotional banner block; start by clicking on the Styletab. From here, you can change how the promotional banner block will appear by editing the style options for the header, category, button style, and image box.
When you’re done customizing your promotional banner, make sure to hit PUBLISH/ UPDATEto save your changes.