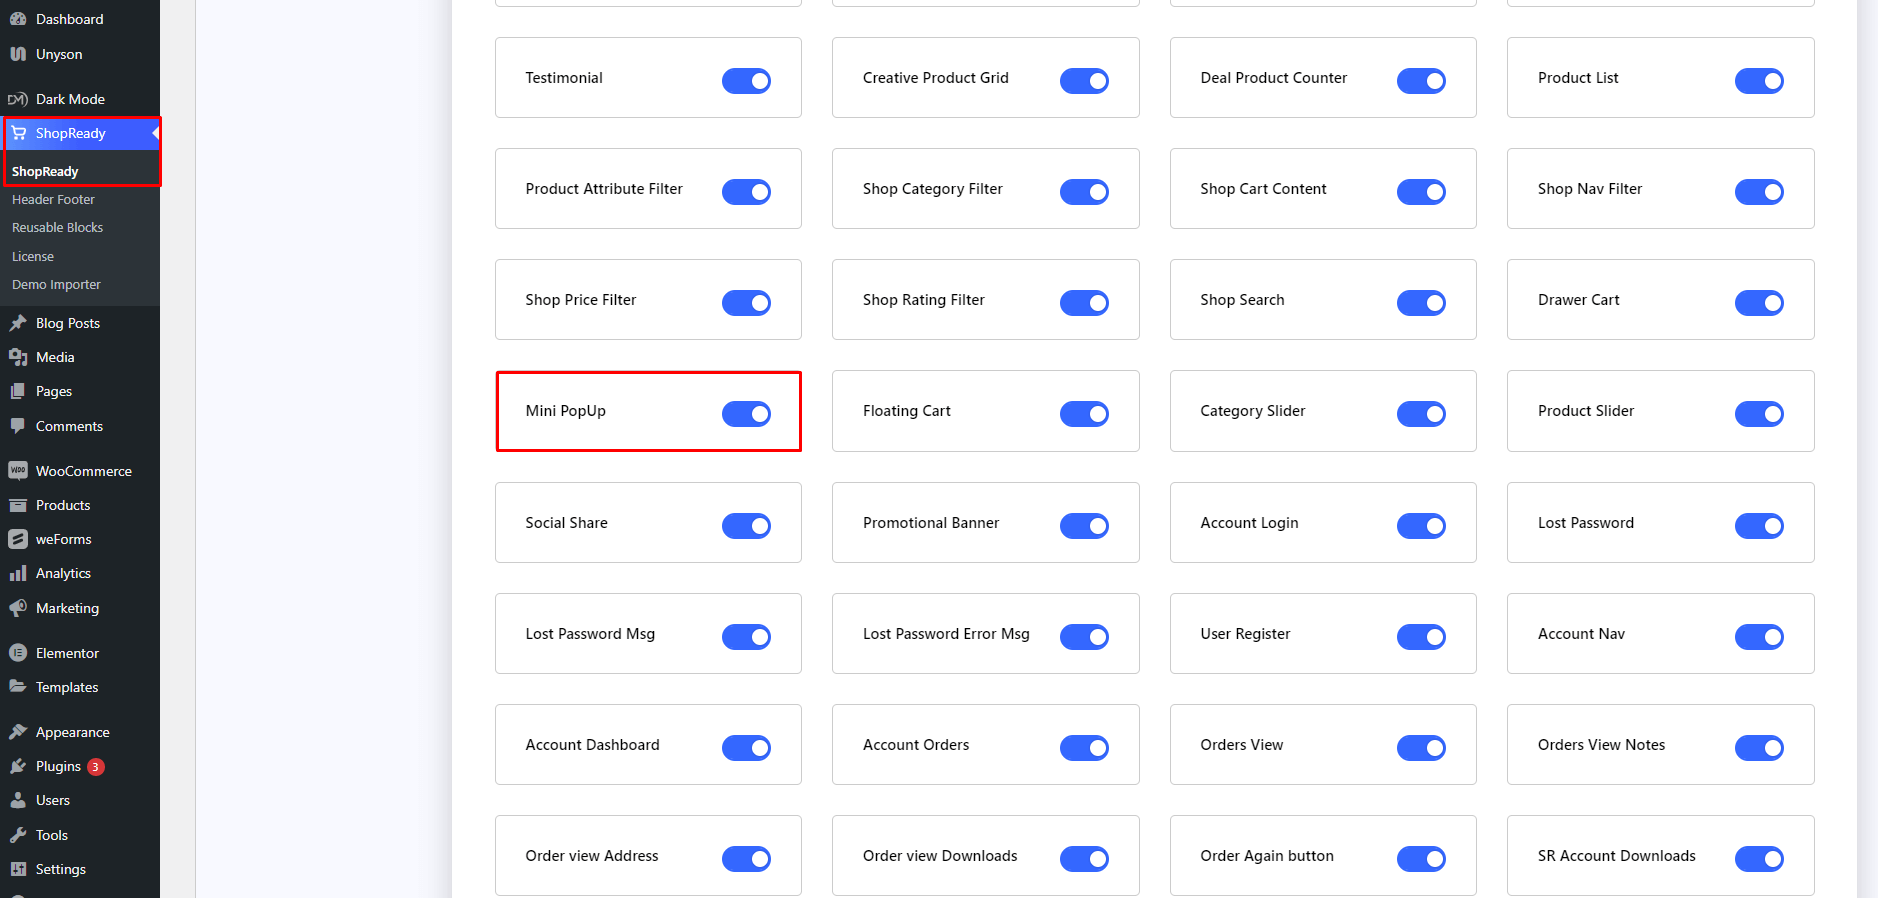
Enable theMini PopUpwidget from the ShopReady dashboard and click on Save Changes.
Step - 02:
Create a new page from the WordPress Dashboard > Pages > Add New. And then click on Edit with Elementor. Or click Edit with Elementor on an existing one..
From the left-hand side, search for the ShopReady Mini PopUpwidget. And drop it onto the newly created page.
Step - 03:
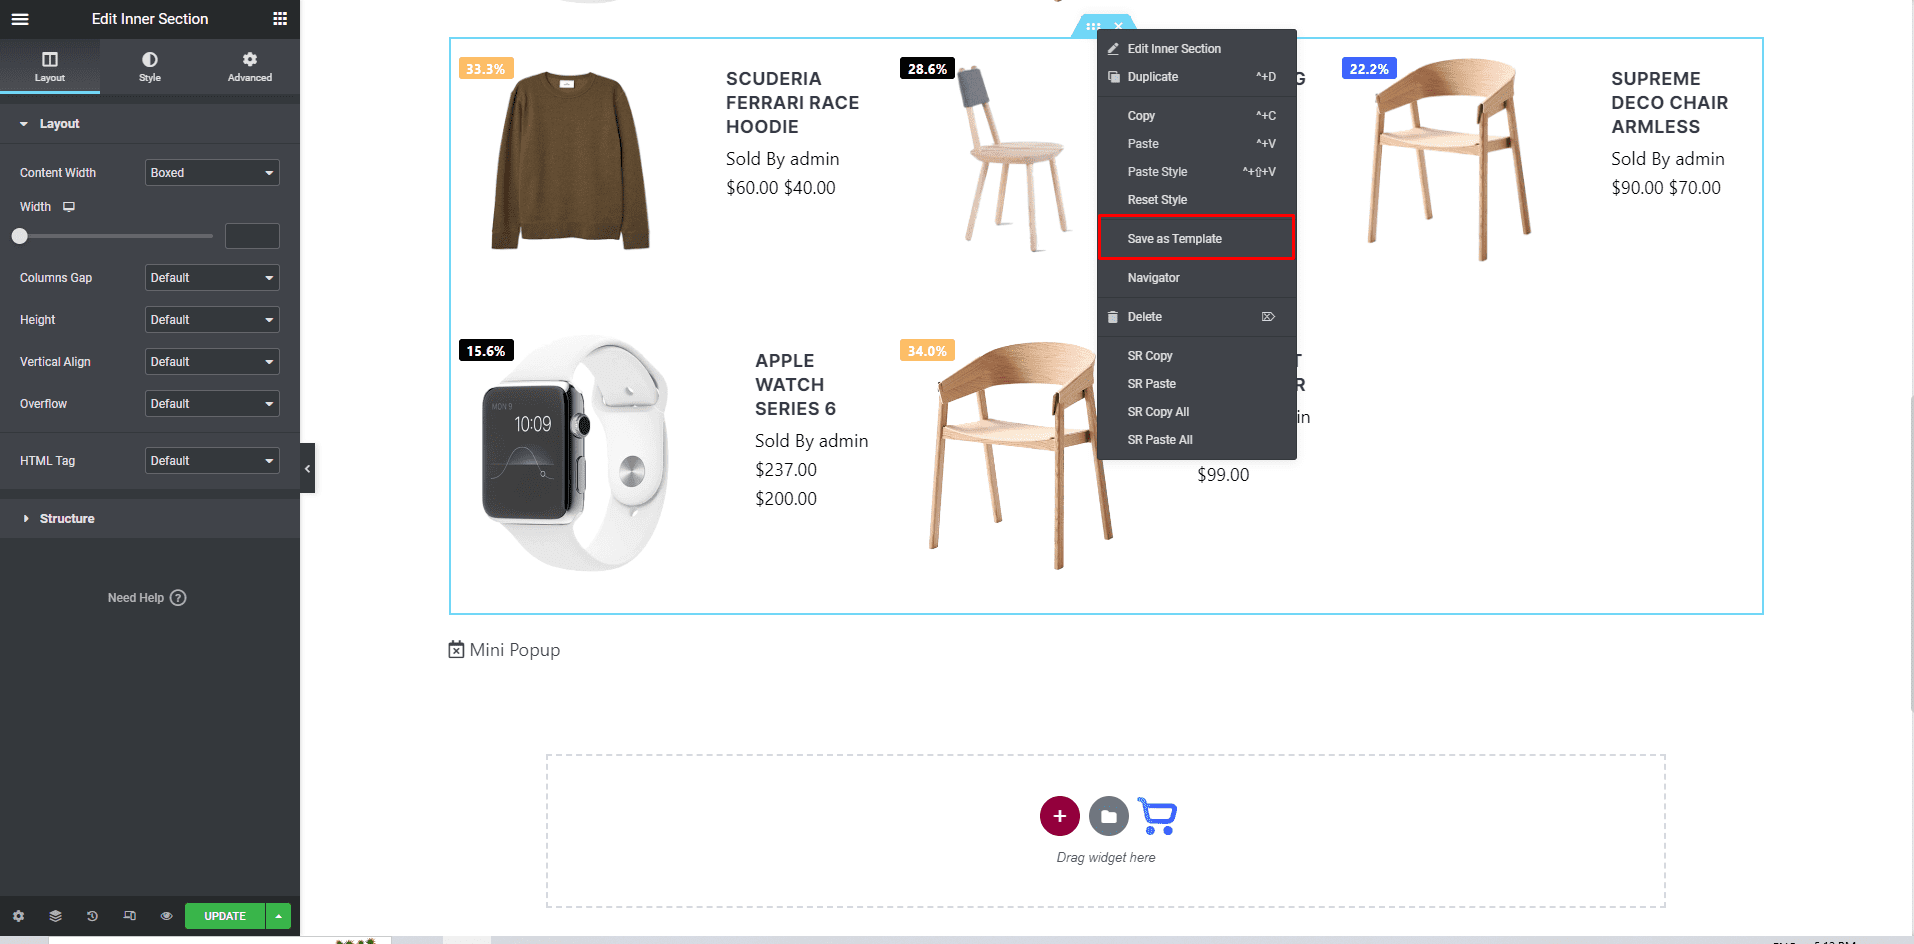
To get the content to be featured on the mini popup, copy any pre-build block and turn it into an Elementor template from your website or create a new template from scratch. To create an Elementor template from an existing block, just click on the Edit Inner Section of that block and click on Save as Template.
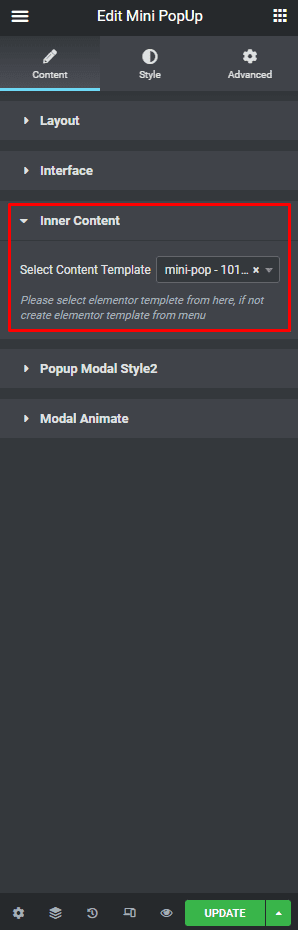
Now to use this newly created template on the mini popup, click on theInner Contentoption under the Content tab.
Step - 04:
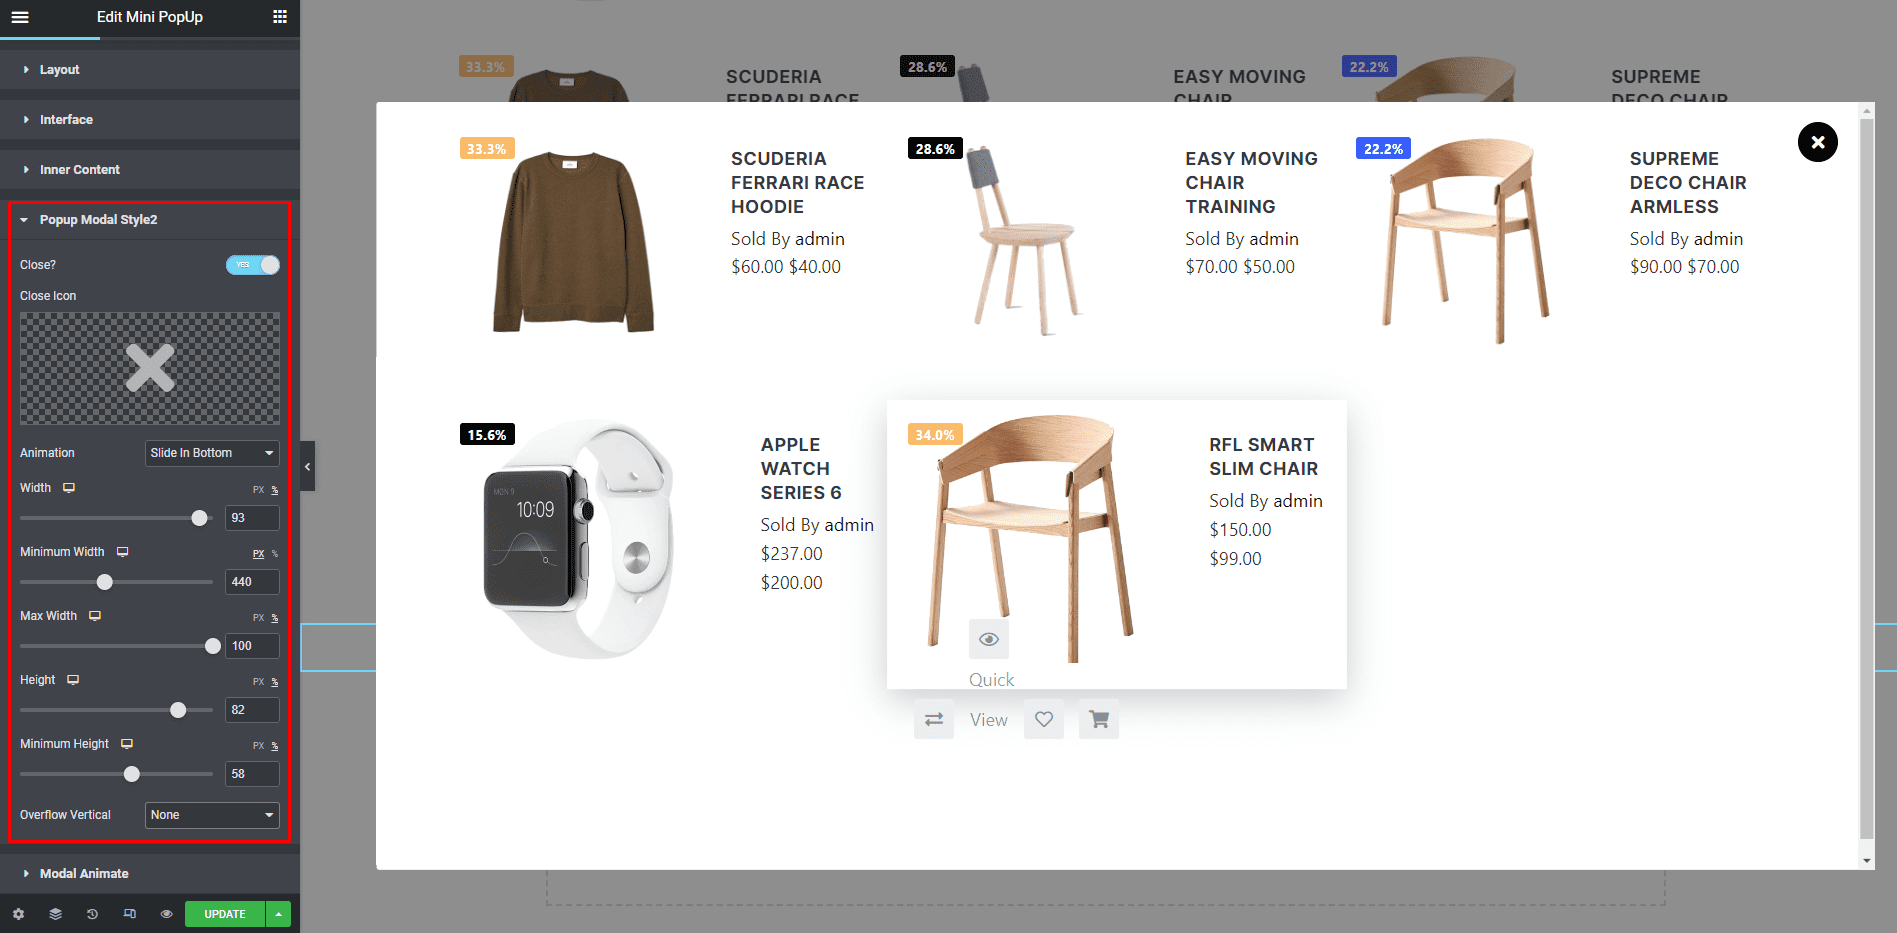
To customize how the popup will appear, click on Popup Modal Style2under the Content tab. From here, you can add an icon to the popup button and customize its size, width, height, etc,
When you’re done customizing your mini popup block, make sure to hit PUBLISH/ UPDATEto save your changes.