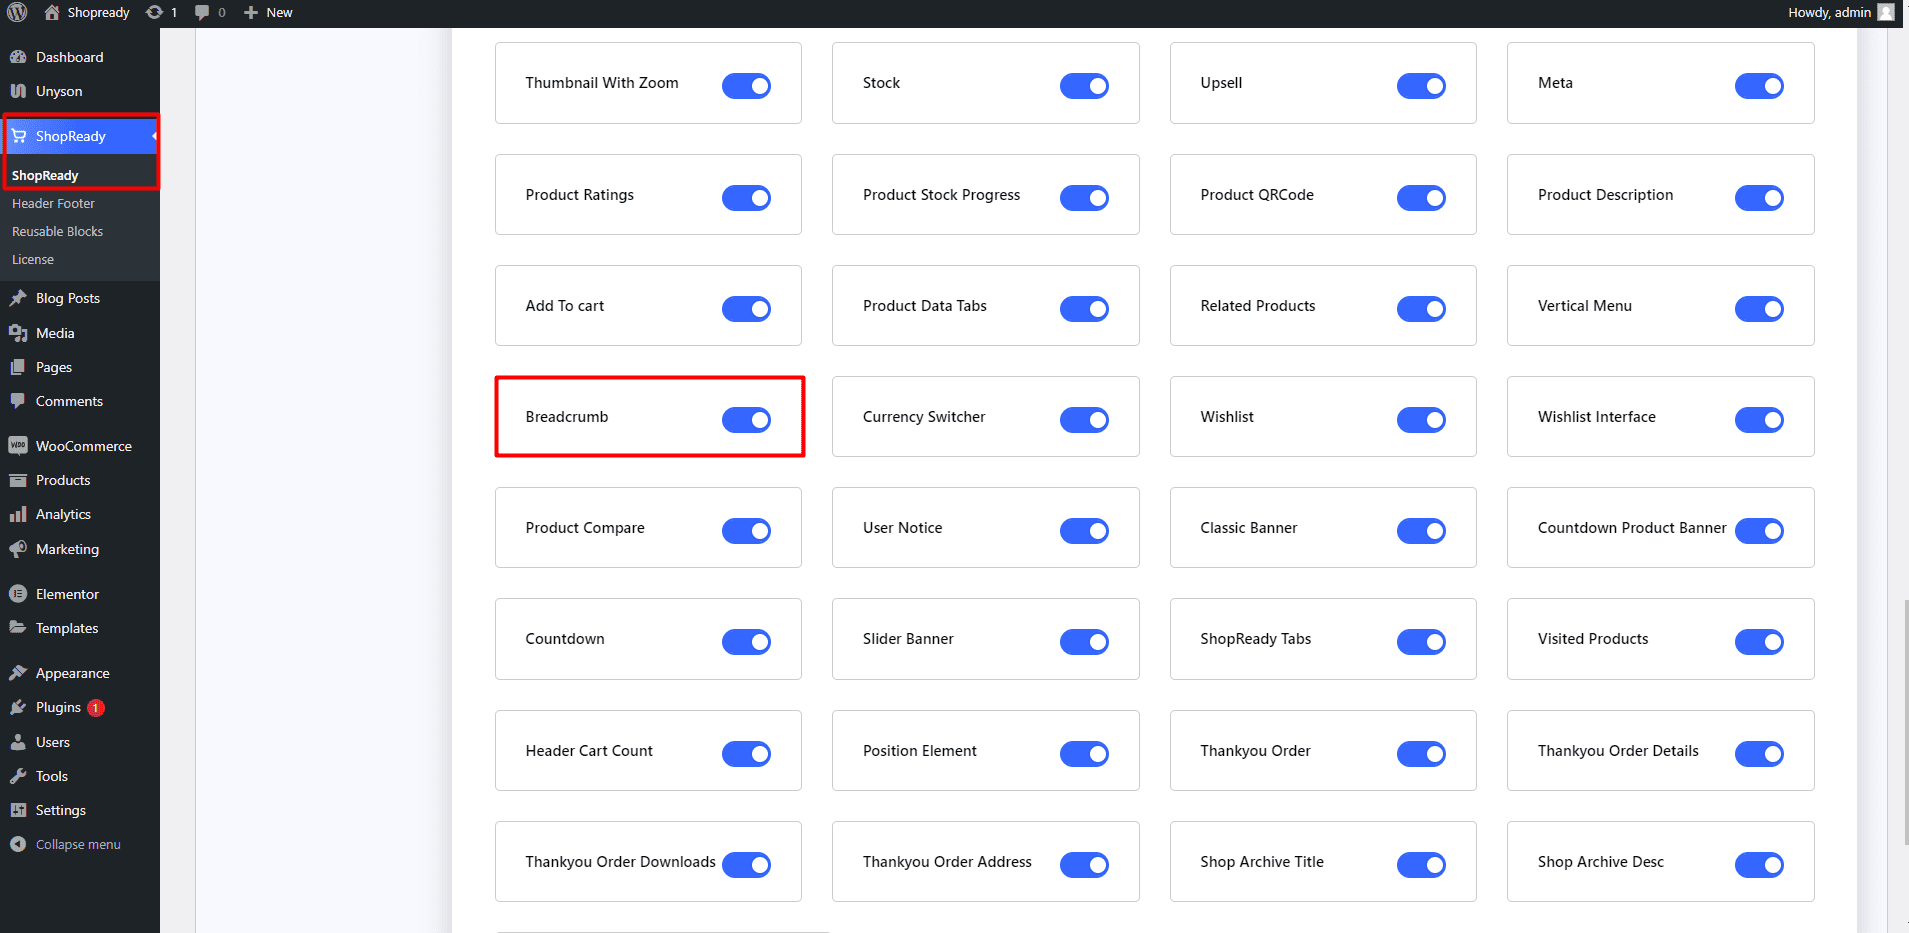
Enable the Breadcrumb widget from the ShopReady dashboard and click on Save Changes.
Step - 02:
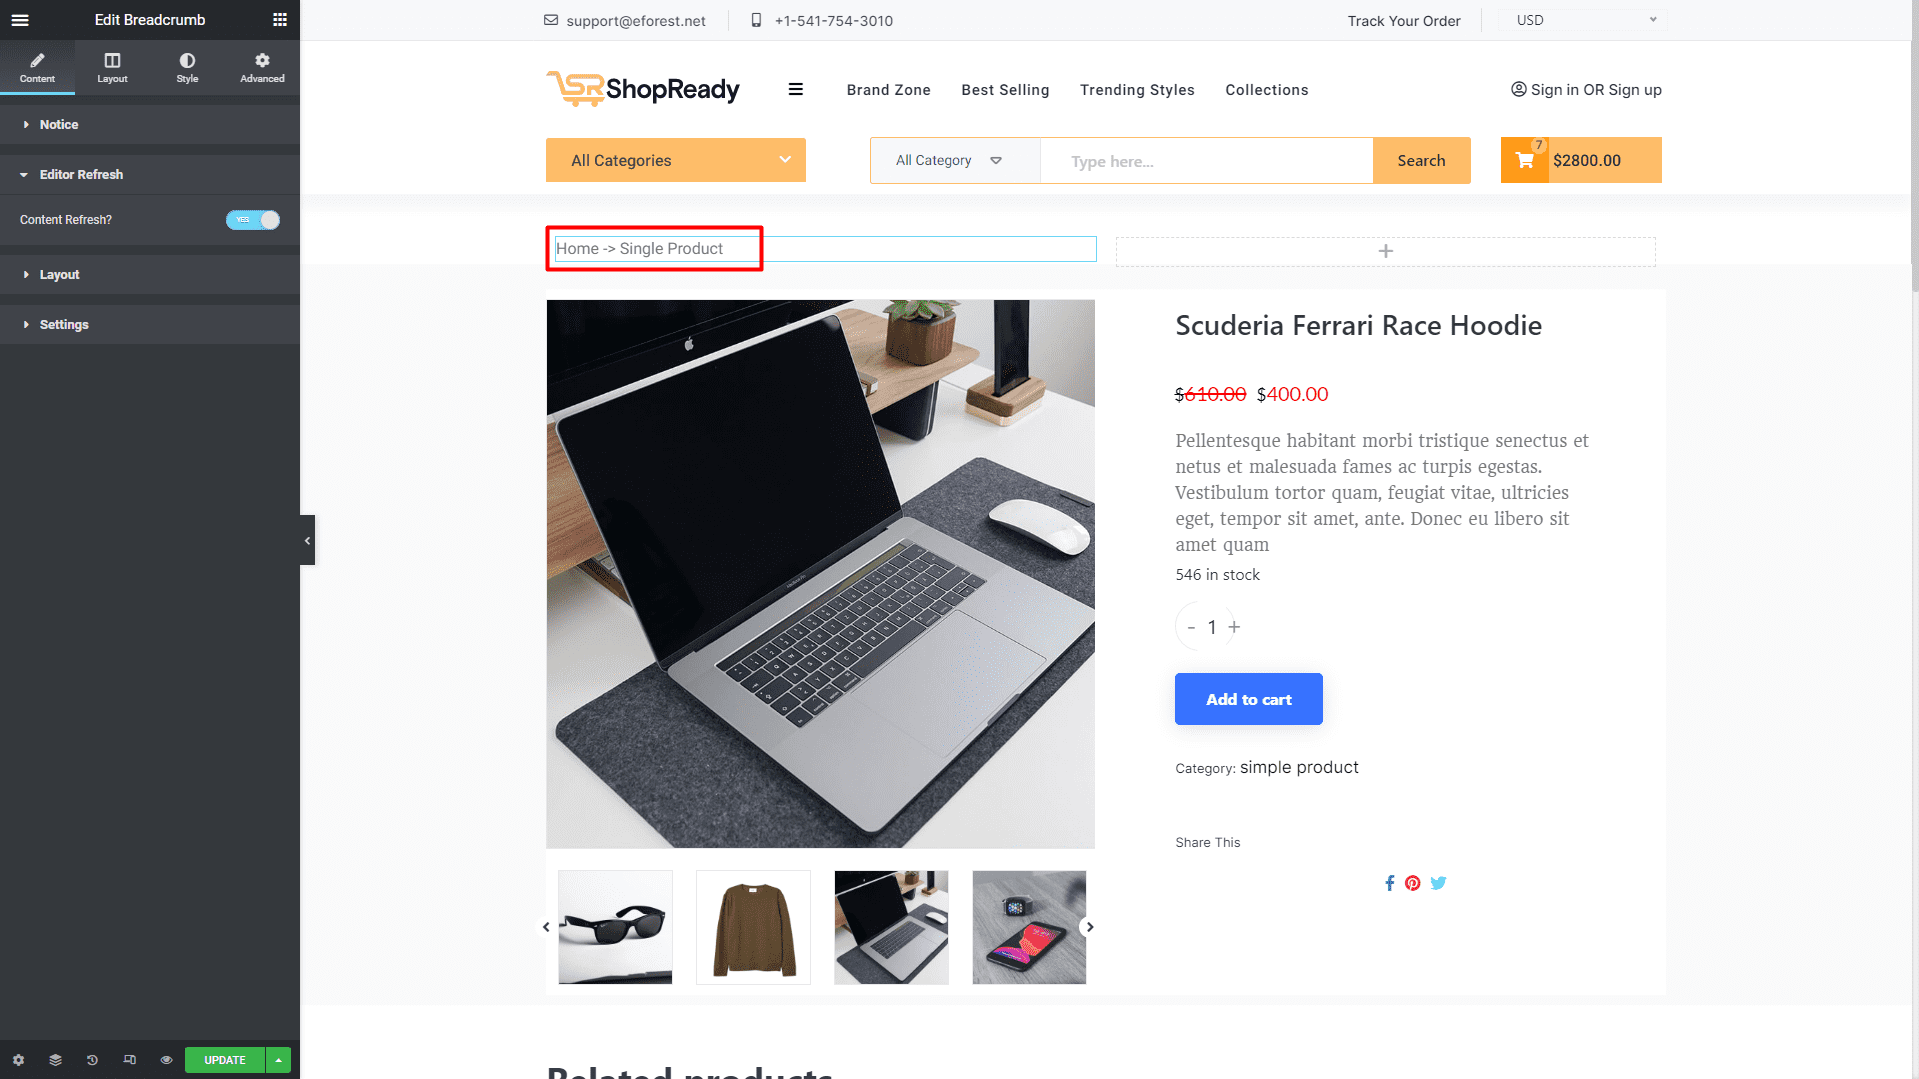
Create a new page from the WordPress Dashboard > Pages > Add New. And then click on Edit with Elementor. Or visit your single product page.
From the left-hand side, search for the ShopReady Breadcrumb widget. And drop it over the product title.
Step - 03:
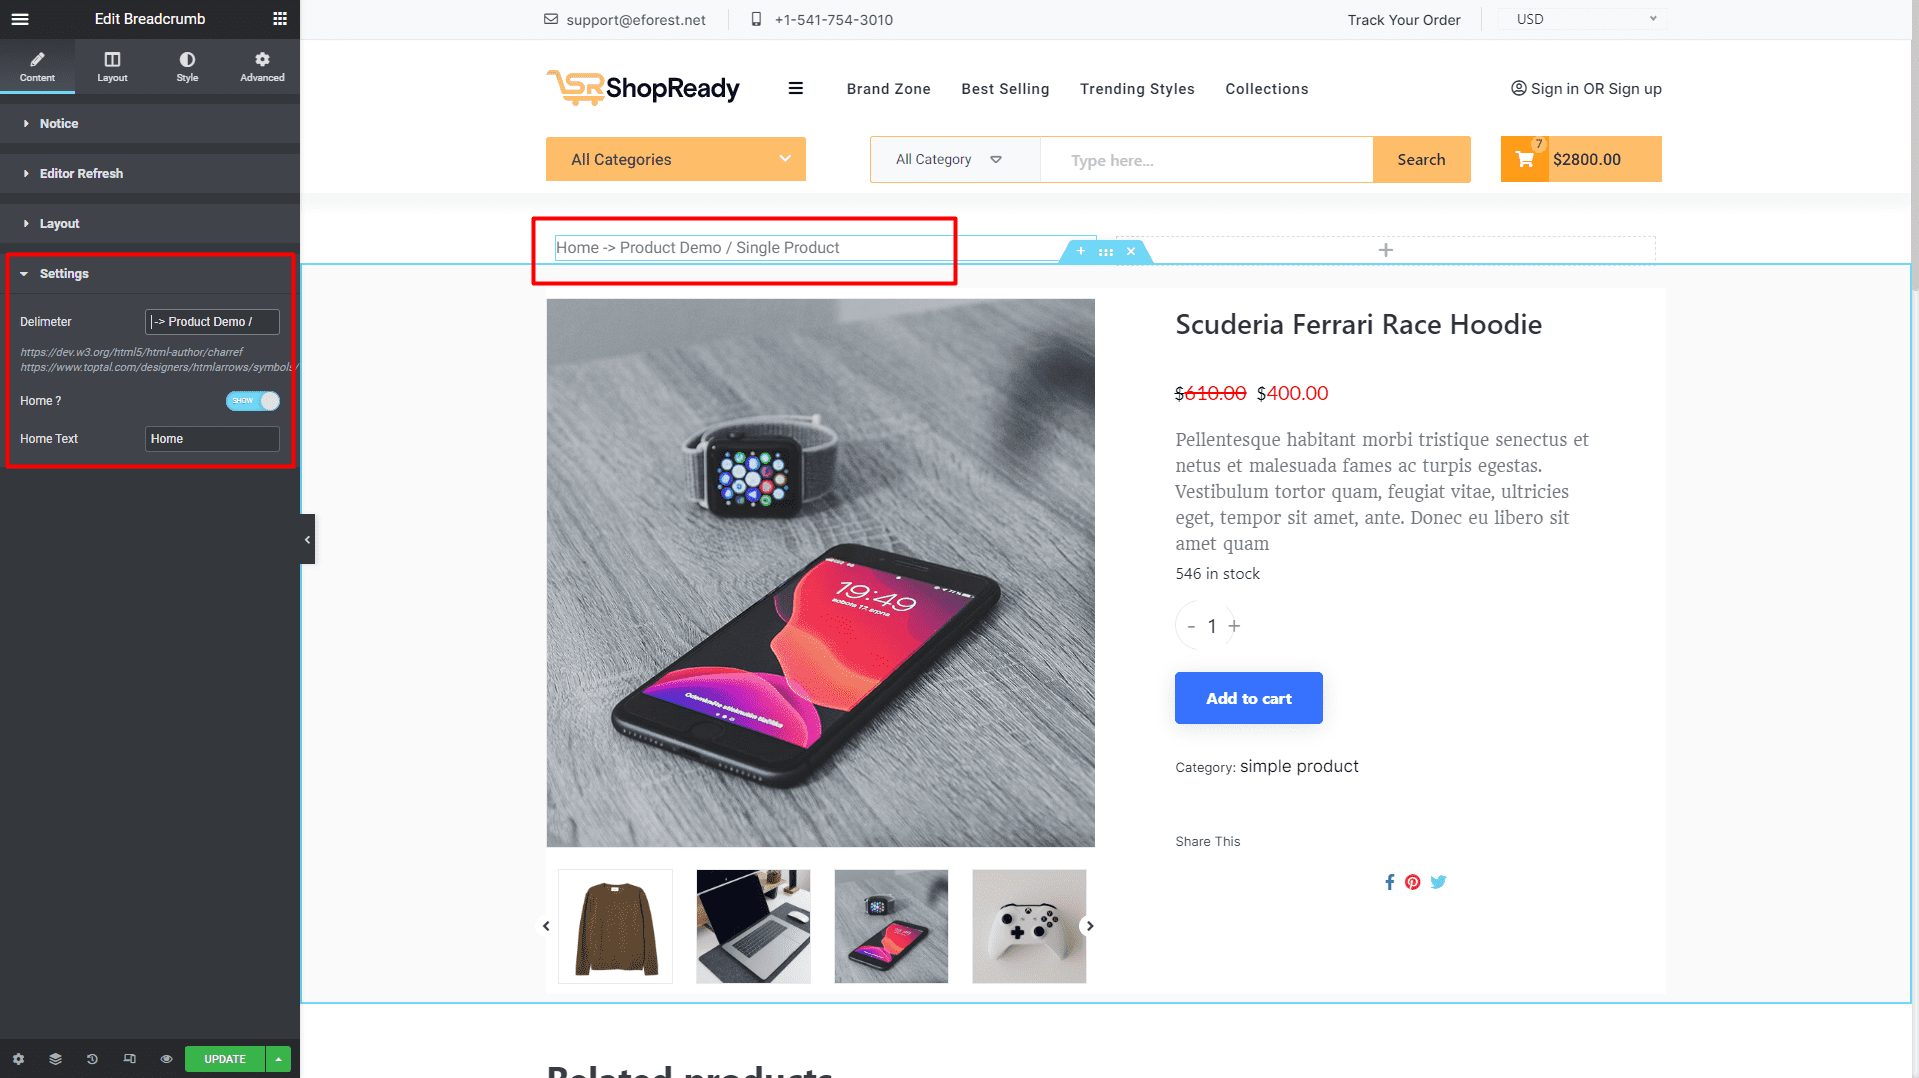
To edit what information gets displayed on the breadcrumb, click on the Settings option under the Content tab. From here, you’ll be able to customize the delirium information and home text.
Step - 04:
You can further customize the breadcrumb block; start by clicking on the Style tab. From here, you can change how the meta information will appear by changing the typography, color, margin, padding, etc., to match the visual appearance of the product page.
When you’re done customizing your breadcrumbs, make sure to hit PUBLISH/ UPDATE to save your changes.